


If you’re planning a cookout this Memorial Day weekend, here are some handy tips and hacks to impress your family and friends.
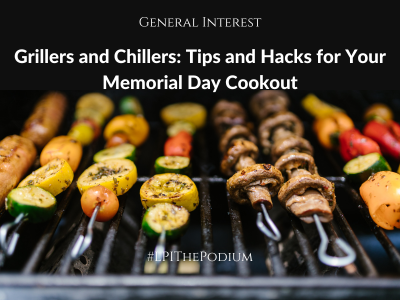
For Grillers
One of the first lessons professional cooks and grillers learn is that certain foods continue to cook even when you remove them from the heat source. Meat, eggs, and veggies are the big three (sauces and pasta follow close behind). So, when grilling your meat, it’s important that you either use a thermometer to check the temperature or use the “finger/palm” test.
The Finger/Palm Test
The problem with the meat thermometer approach is that when you poke a hole into the meat with a thermometer, it can let juices escape, juices that you would rather have stay in the meat. For this reason, most experienced cooks rely on a “finger test” method, especially on steaks. This is one of those things that gets easier with practice. The next time you cook a steak, even if you are still planning to rely on a meat thermometer, press on the meat here and there while it cooks, and compare the feeling of the meat with the following finger test. With practice, you will become more confident.
Open the palm of your hand. Relax your hand. Take the index finger of your other hand and push on the fleshy area between the thumb and the base of the palm. Make sure your hand is relaxed. This is what raw meat feels like. (Check this out the next time you have a raw steak to cook.)
Well Done. Now gently press the tip of your pinky and your thumb together. Again, feel the fleshy area below the thumb. It should feel quite firm. This is what well-done meat feels like when you press on it. (Check this out the next time you overcook a piece of meat.)
Medium. Press the tip of your ring finger and your thumb together. The flesh beneath the thumb should give a little more. This is what meat cooked to a medium doneness feels like.
Medium Rare. Gently press the tip of your middle finger to the tip of your thumb. This is medium-rare.
Rare. Press the tip of your index finger to the tip of your thumb. The fleshy area below the thumb should give quite a bit. This is what meat cooked to rare feels like. Open up your palm again and compare raw to rare.
Combatting Dryness
Get a good sear on the meat.
Resist the urge to poke into or cut into the meat while it is cooking. The only way you’ll keep it juicy is to stop messing with it.
Watch your heat level.
Keep a spray bottle or can of beer next to the grill for hydrating your meat and veggies. You can always use water, but why not kick it up a notch? For chicken, pork, seafood, and sausage try using apple juice, pineapple juice, or orange juice. For beef, a spritzing of beer, room-temp broth, or seasoned balsamic vinegar can add great moisture and flavor (do not use a vinaigrette, which contains oil and will flare up when it comes into contact with your burners). Diluted barbecue sauce is also a great flavor enhancer and moisture additive and helps give some caramelization to your meat. For veggies, a spritz of lemon juice, seasoned butter, balsamic vinegar, or herb-infused water is great!
Avoiding Overcooking
Remember, meat and veggies continue to cook even when they are removed from the heat source! So, if your pork ribs are supposed to be “done” at 140°, take them off the grill at around 128° to 130°. Cover them in foil and let them rest until ready to serve. Do the same with steak and chicken. If you think that steak isn’t quite ready, take it off the grill, loosely cover it with foil and let it rest for 5 to 10 minutes. You will be surprised at how much your steak has continued to cook. Test chicken the same way. You can have moist, tender chicken without having it undercooked. It’s a matter of timing and practice! And don’t forget that most veggies are pretty delicate once they get on the grill. If you see your veggies start to shrivel and dry around the edges, they’ve already lost moisture. You want a lovely grill mark or char, which doesn’t take very long. Use a grilling screen and put them at the back of the grill or on a rack above the heat source for the best results.
For Chillers
Side Salads
The best tip/hack I ever received for side dishes like potato salad, macaroni/pasta salad, coleslaw, fruit salad, veggie salad, etc., is to only use half the mayo or dressing when first mixing the salad. This is because the potatoes, pasta, and veggies will soak up just about every bit of mayo/dressing you initially put into it. And that’s okay. Let that sit in the fridge and soak it up. The trick to moist or creamy salads is to wait until just before serving to add the rest of the dressing when the salad has already soaked up the first half. For fruit salads or veggies that emit a lot of juice and moisture, let the natural juices come through and drain if needed, or use that moisture to enhance the dressing you plan to use.
Also, the more ingredients you add to your salad, the more mayo/dressing it will soak up. Consider waiting to mix in the diced hard-boiled eggs, chopped olives, avocado, etc., which will make your salad look and taste fresher. If you’re using baby shrimp or scallops in your salad, definitely wait to add it until just before serving so that it doesn’t get mushy and broken.
Ice Bath
This may not seem like much of a hack, but it is definitely good for keeping cold foods cold and reducing the risk of food poisoning.
Use a larger dish or bowl half-filled with ice and settle your cold dish halfway down into the ice. Pour some cold water into the ice in the outer bowl – – just enough to create an ice bath. This will help make sure your dish stays at the right temperature. Just be sure to replenish the ice as needed. A great hack that’s become popular the past several years is to use a kiddie-sized wading pool filled with ice to place all of your cold foods and drinks.
Drinks
And speaking of drinks, there are so many great ideas for jazzing up your cookout beverages, it would be impossible to list them all. But here are some of my favey-faves!
Hawaiian Lemonade – – Lemonade infused with fresh pineapple chunks and a spritz of club soda or Sprite.
Arnold Palmer – – Half lemonade/half iced tea. So refreshing!
Freckled Lemonade – Lemonade infused with muddled strawberries.
Infused Water – – Ice cold water infused with fruits such as sliced apples, oranges, lemons, and berries. Or use sliced lemons and thinly-sliced cucumbers.
Spritzers – – For non-alcoholic spritzers, use Sprite or flavored seltzer water and use any of the same ingredients listed for infused water. For alcoholic spritzers, use a good Prosecco or Moscato and add a bit of fruit juice and a little fruit.
Mimosas – – You can really have a lot of fun with these. Use champagne or prosecco as a base and mix in juices such as cranberry, pineapple, orange, guava, etc. Garnish with fruit and mint sprigs.
For the Kids – – Dixie Cups filled with fruit punch and chunks of fruit, then frozen until slushy. Kool-aid mixed with lemonade or juice and frozen into ice pops. Water bottles filled with crushed ice and chunks of frozen fruit.
And my super-seriously-favey-fave . . . The Triple Chiller-Thriller Slushie. Chill/freeze stemless or regular wine glasses. Super-chill champagne, prosecco, or bubbly Moscato. You want it as cold as you can get it before the freezing point. Place a frozen fruit bar (such as Outshine, Chloe’s, etc.) inside the chilled glass. Pour the super-chilled liquid over the frozen fruit bar and watch it fizz and create the best homemade grown-up slushie you’ve ever had! (For a non-alcoholic version, use Sprite, Squirt, or Ginger Ale.)
Categorized in: General
| << previous | next >> |